It’s no secret we all have weaknesses that tend to cause problems in the weight room, on the field of play and in our daily lives. If you’re an athlete, you should know that the big players in hip pain tend to be the glutes and the anterior core. If those aren’t on point, you’re doomed to a life of pain and impaired performance.
But there are also some lesser-known common weaknesses that can impact hip function and potentially put an anchor on your health and performance. Here’s what they are, how to assess if you have the weakness, and what you can do to fix it.
1. The Diaphragm
The diaphragm can have a big impact on hip function. If you aren’t great at breathing—and in our society, few people are—your diaphragm is likely to blame.
To understand why, you must understand that we live in what many would define as a “highly sympathetic” world. Your sympathetic nervous system, also known as fight-or-flight, is cranked up all the time. You have to get to school or work on time, you’ve always got a project that needs to get done, you constantly need to balance a million things—you get the point. All this stress shuts down the opposing portion of your autonomic nervous system, which is known as the parasympathetic nervous system. If sympathetic is the fight-or-flight system, then parasympathetic is the rest-and-digest system.
The diaphragm is actually intended to be your body’s primary breathing muscle. But as a consequence of modern life and our sympathetic nervous system always being “on,” it’s been shunned like a player who missed the game-winning penalty shot. Instead, the much less efficient breathing muscles of the upper chest and neck must take over, creating all sorts of issues and keeping the sympathetic nervous system cranked up all the time.
Although it doesn’t look very sexy, diaphragmatic breathing allows you to create a better balance between fight-or-flight and rest-and-digest and could be the key to fixing a lot of movement issues as well. By doing diaphragmatic breathing, you tell your body to calm down, get centered and start paying attention. When you breathe, this dome-shaped muscle contracts, allowing the lungs to take in air. What you should see with proper diaphragmatic breathing is the stomach rising as the dome compresses the abdominal cavity.
This should feel like you’re pressing your belly out or trying to look fat. I often see the exact opposite, and while it may present a more pleasing side profile, it only allows the lungs to partially expand and results in weaker core stabilization. In short, tight hips and sore shoulders may be as simple as your breathing, since an under-active or dysfunctional diaphragm is going to lead to movement issues across the board. Proximal stability leads to distal mobility.
How to Identify It
Lie on your belly with your forehead on your forearms. If you take a deep breath without any instruction, you’ll probably notice that your upper body rises up more than your belly. The video above is not only an assessment but can also be used as a beginner drill for correcting your breathing pattern.
How to Correct It
Start and end every training session with the breathing drill above. This doesn’t need to take more than about a minute or maybe eight breaths. This may even be something you want to build into a daily routine to reset and de-stress. Here are a couple of additional drills that may help teach you to use your diaphragm.
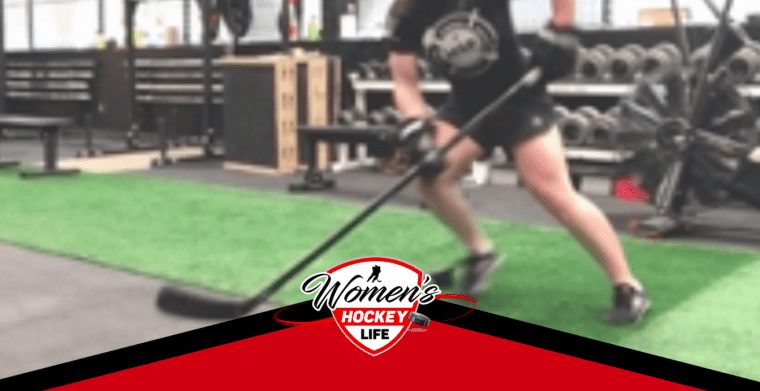
2. The Adductors
When it comes to articles about training the lower body, the adductors often get no love. Yet, you can find countless glute articles (because everyone likes a good booty) and tons of information on the quads and hamstrings. But here’s the deal: the adductors play a much larger role than most people know, especially for athletes and hockey players, in particular.
There’s a reason adductor strains (also known as groin pulls) are one of the most common hockey injuries around the world, especially among those less-than-elite athletes who still enjoy playing the sport.
The five muscles that make up the adductor group include nearly a quarter of the lower-body musculature. If you believe they are simply there to move your leg toward the body’s midline (which is what “adduct” means), you are grossly mistaken. For the most part, your adductors work as stabilizer muscles, steadying the pelvis along with the opposite side’s glute medius, glute minimus and quadratus lumborum.
Because they’re not built to be primary movers, the adductors are even more susceptible to injury in sports like hockey, where they’re constantly tasked with pulling the leg back to midline. The gracilis muscle is the only adductor to cross both the hip and knee joint, and also plays a role in stabilizing the knee during weight bearing activities.
How to Identify It
There really aren’t that many tests that allow you to assess the strength of your adductors without a certified healthcare professional there to make a decision based on what they see and feel. For the sake of this article, we’re going to assume that unless you’ve been doing the exercises below for a significant period of time, your adductors are weak and need to be fixed. The one test you can try is an isometric adductor lift, which I also like to call the Jane Fonda test (seen above).
If you’re either (a) not able to lift your leg off the table or floor or (b) have to fight like crazy to keep it off the table, and possibly cramp in the process, then your adductors need some serious work.
How to Correct It
There’s a lot going on in those hips, and finding the right areas to focus on can be a job in and of itself. For now, let’s focus on strengthening the adductors.
The first and simplest drill only involves the adductors and can be done with no equipment at all (but adding a soccer ball would be ideal). Simply lie on your back with your knees bent and your fists (or said soccer ball) between your knees. Flatten your back and squeeze the soccer ball for 10 seconds. Relax and repeat.
Next, you can add the other major players in pelvic stabilization, which are the glute medius and the oblique. The best way to do this is by using various Side Plank variations.
You can use a basic Side Plank, but this will not target the adductors like you want it to. I learned these next couple of variations from Chad Benson of BCPTI, and these are NO JOKE. Do them properly and you will be putting in some serious groin work.
*if this is too challenging, try the regression starting at 0:12
3. The Hip Flexors
Raise your hand if you persistently stretch your hip flexors to no avail. Lots of you just shot your hands up, I’m sure. I used to be the exact same way.
The real problem is likely that your hip flexors are weak, which is causing them to become stiff in an effort to create tension around the hip joint. They may not be very good at it, but they’re going to do their job and support that joint by whatever means necessary.
Our bodies are intuitive, and when they sense instability or weakness this can often be perceived as tightness. So, while you think you might be able to address what feels like “tight hips” with stretching, you’ve actually got to strengthen those muscles.
One of the major hip flexors in the body actually inserts on the spine. The psoas plays a crucial role in spinal stability and can be a huge player in lower back pain and perceived hip mobility. Retraining the psoas’ role in spinal stability can be key in reducing hip pain, so let’s start there.
How to Identify It
Although there are many ways to test hip mobility, we want to test the strength of the psoas without support of the surrounding muscles. I have come to love the above variation from Mike Reinold and have been building some form of it into a lot of my client programs lately.
In this assessment, you passively raise the hip into flexion and then let go, trying to keep the hip flexed. Use a mirror to see how much each knee falls when you let go and note if there are any differences between sides.
If you find this test to be easy, try the following more difficult test, which comes from Kelly Starrett (one of my all-time favorite trainers).
Can you hold that position for one full minute? If not, here’s how to correct it.
How to Correct It
My favorite exercise to strengthen the hip flexors and the psoas, in particular, is the Psoas March (shown above). The lower back is supported and we can turn on the muscles of the anterior core, ensuring the work is being done by the psoas.
Next, we have a couple of beauties from Dr. Teddy Willsey (@strengthcoachtherapy) that progress the above exercise by removing the support that the floor provides.
Whether or not your hips currently give you problems, these are some areas I’d suggest every hockey player addresses. Remember to move the big rocks like the glutes and anterior core first, then start building in some of these more obscure movements to really hammer home hip stability.
Want a simple, efficient plan to improve your hip stability, reduce your chance of injury and skyrocket your sports performance? Grab your copy of my free Plyo Playbook, that includes several months of progressions to build your speed and explosive power.
Looking for more hockey-specific training tips from Gavin?
Check out his previous articles here!
[adrotate group=”1″]
Related Articles


Categories
Recent Posts


[adrotate group=”2″]